


How to Set Up Your Car Seat to Prevent Pain
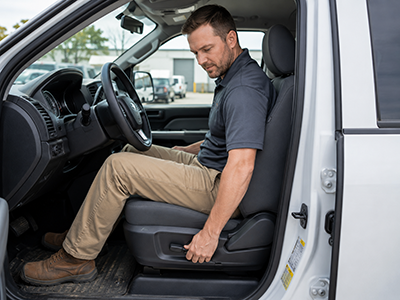
Most organizations invest real effort in the chairs their employees sit in at the office and almost none in the seats those same employees occupy for two hours a day on the road. It is an easy oversight to make. A vehicle seat looks like it was designed by professionals, it adjusts at the touch of a button, and it came with the car. But a seat that was engineered for an average body in a crash test is not the same thing as a seat configured for the specific person driving it, and the difference shows up as back, neck, and shoulder pain within a few months.
If your team includes field technicians, sales representatives, delivery drivers, home health workers, or anyone with a company vehicle assignment, their driving posture is a workplace ergonomics issue. Here is how to set a vehicle seat up correctly, in the order the adjustments should actually be made.
Why Driving Puts Different Demands on Your Body
A vehicle seat is a fixed posture with moving parts
At a desk, you can shift, stand, cross your legs, or walk to the printer. Behind the wheel, your right foot is committed to the pedals, both hands are occupied, your eyes are locked forward, and your seatbelt limits how far you can reorganize yourself. What looks like sitting is closer to a sustained, low-level static hold, and static holds are what connect poor ergonomics to musculoskeletal disorders over time.
Vehicles also add a variable the office does not have: vibration. Road vibration transmits through the seat pan into the pelvis and lumbar spine, and prolonged exposure fatigues the small stabilizing muscles that would otherwise hold your posture together. A seat position that feels tolerable in a parking lot can become genuinely uncomfortable ninety minutes into a highway drive.
The pain patterns drivers report most
In our vehicle evaluations, three complaints come up again and again, and each one traces back to a specific misadjustment.
Low back pain almost always accompanies a seat that is reclined too far, a seat pan tilted so the hips sit lower than the knees, or lumbar support that is set too low or turned off entirely. Neck and upper shoulder tension typically points to a headrest positioned behind rather than beside the head, a seat set too far from the wheel, or mirrors that force a chronic head turn. Hip, knee, and right-leg fatigue usually indicates a seat pan that is too long for the driver’s thigh or a pedal distance that requires the leg to stay fully extended.
The encouraging part is that all three are adjustment problems, not equipment problems. In most cases the vehicle already has the range of motion required to solve them. Drivers just have never been shown how to use it, and much like bad work ergonomics quietly causing back problems at a desk, the cause is rarely obvious to the person experiencing it.
Start With the Driver, Not the Vehicle
Before touching a single control, it helps to know something about the body that will occupy the seat. When our consultants conduct a vehicle ergonomic assessment, we take three straightforward measurements that determine nearly every adjustment that follows:
- Top of head to bottom of buttocks. This seated height tells us how much headroom the driver needs and where the seat can sit vertically without compromising sightlines or clearance.
- Back of buttocks to front of knee. This thigh length determines the correct seat pan depth. A pan that extends past this measurement compresses the back of the knee; one that falls well short leaves the thigh unsupported.
- Back of knee to floor. This lower leg length sets the seat height at which the feet can operate the pedals with the knee in a comfortable, slightly bent position.
Two drivers who are the same overall height can have meaningfully different proportions between torso and leg, which is exactly why a seat handed off between shifts, or a “set it once” approach to fleet vehicles, tends to leave someone uncomfortable. Anthropometry is the reason a universal setting does not exist.
The Correct Order of Adjustments
Sequence matters here more than most people expect. Each adjustment changes the reference point for the next one, so working out of order means redoing your work. Start with the seat and finish with the mirrors.
Step 1: Set the seat height first
Raise the seat until your hips are level with or slightly higher than your knees, and until you have a clear view of the road with roughly three to four inches of clearance between the top of your head and the roof. Hips sitting below knee level rotates the pelvis backward and flattens the lumbar curve, which is the single most common source of driver low back pain.
You should be able to see the instrument cluster without ducking or craning. If raising the seat high enough for good visibility puts your head into the headliner, that vehicle may simply be a poor fit for that driver, which is useful information for fleet purchasing.
Step 2: Adjust seat pan depth and distance from the pedals
Slide the seat forward or back until you can fully depress the brake pedal while keeping a slight bend in your knee, generally in the range of 20 to 30 degrees. A fully extended leg forces your hips forward and out of the seat back every time you brake hard. Sitting too close overflexes the hip and knee and crowds your steering arc.
If your seat offers adjustable pan depth, set it so that two to three fingers fit between the front edge of the seat and the back of your knee. Too much contact there restricts circulation on long drives, which is often mistaken for a “numb leg” caused by the seat itself.
Step 3: Set the backrest angle
Recline the backrest to roughly 100 to 110 degrees relative to the seat pan. This is the range where the spine carries the least disc pressure while still allowing you to reach the wheel without lifting your shoulder blades off the seat.
The instinct to lean back further is understandable and counterproductive. Every additional degree of recline pushes your head forward to maintain your sightline, and a forward head position is precisely what generates the neck and upper trapezius tension so many drivers report. The same principle governs good seated posture at a desk, and it applies with more force in a vehicle where you cannot easily reset.
Step 4: Dial in lumbar support
Adjust the lumbar support so it fills the natural inward curve of your lower back without pushing you forward. You are looking for contact and gentle support, not pressure. Set at the wrong height, lumbar support does more harm than none at all, and the correct height is generally at or just above your beltline.
If the vehicle lacks adjustable lumbar support, a small rolled towel or a purpose-built lumbar cushion works well. Avoid oversized aftermarket cushions that reposition you so far forward that your other adjustments no longer hold.
Step 5: Position the headrest
Raise the head restraint so its center sits level with the top of your ears, not the back of your neck, and move it forward until it is within two to three inches of the back of your head. The head restraint is a safety device before it is a comfort feature, and its protective value in a rear-end collision depends almost entirely on that gap being small.
A restraint set too low or too far back also encourages the forward head posture described above, which means a two-second adjustment addresses both crash protection and daily neck strain.
Step 6: Adjust the steering wheel
With your back against the seat, extend your arms straight forward. Your wrists should rest on the top of the wheel without your shoulders leaving the seat back. Then lower your hands to the nine and three o’clock positions, where your elbows should show a comfortable bend of roughly 20 to 30 degrees.
Tilt the wheel so it points toward your chest rather than your face, and keep at least ten inches between the center of the wheel and your sternum for airbag clearance. If your vehicle offers telescoping adjustment, use it before you resort to moving the seat forward, since moving the seat undoes the leg positioning you established in step two.
Step 7: Set the mirrors last
Mirrors are the final step for a reason: they should be set to your correct posture, so that they quietly enforce it. Adjust all three from your fully established seated position.
Set the rearview mirror to frame the entire rear window without leaning. For the side mirrors, lean your head against the driver’s window and set the left mirror so you can just see the edge of your vehicle, then lean toward the center console and set the right mirror the same way. This dramatically reduces blind spots and, just as importantly, means that any drift out of your correct posture immediately shows up as a mirror that no longer looks right. It is the most reliable posture feedback system available in a vehicle.
Step 8: Check the armrests and seatbelt
Set armrests so they support your forearms without elevating your shoulders. An armrest that is too high creates exactly the shoulder shrug you are trying to avoid, and many drivers unconsciously ride with one shoulder higher than the other for an entire shift.
Position the shoulder belt across the middle of your collarbone, never against your neck, and use the belt height adjuster if the vehicle has one. A belt that rubs the neck gets pushed behind the arm, which eliminates its protection.
Habits That Matter as Much as the Setup
Even a perfectly configured seat does not cancel the effects of remaining in one position for hours. Encourage drivers to break up long routes every 60 to 90 minutes, get out of the vehicle, and spend two minutes walking and extending through the hips and thoracic spine. The value of stretching and taking breaks is well established in office settings, and the case is stronger in a vehicle where the posture is more constrained.
A few smaller habits carry more weight than they appear to. Remove a wallet or phone from the back pocket before driving, since even a half-inch of asymmetry under one hip tilts the pelvis for the entire trip. Get in and out of the vehicle by sitting down first and then swinging both legs together, rather than leading with one leg and twisting the loaded spine. Mount phones and navigation devices at eye level near the windshield rather than low on the console, where every glance repeats a forward head movement. And use cruise control on long stretches when conditions allow, which lets the right leg rest in a neutral position instead of holding a constant angle.
What This Means for Fleet Decisions
Once you understand how these adjustments interact, vehicle selection becomes a more informed conversation. The features that matter most for driver health are the ones that expand adjustability: seat height adjustment with sufficient range, adjustable lumbar support in at least two directions, a telescoping steering column rather than tilt alone, and adjustable seat pan depth where available.
For shared or pooled vehicles, memory seat settings tied to a driver profile are worth the incremental cost, because the alternative is a driver reconstructing eight adjustments at the start of every shift, which in practice means they will not. Vehicles assigned to a single driver deserve a one-time professional setup; vehicles shared across shifts deserve a documented baseline that each driver can restore quickly.
When you are evaluating a purchase, have the tallest and shortest drivers who will actually use the vehicle sit in it and run through the sequence above. A vehicle that cannot accommodate both ends of your roster will generate discomfort claims regardless of how well it performs on paper.
Frequently Asked Questions
How far should I sit from the steering wheel?
Maintain at least ten inches between the center of the steering wheel and your sternum for airbag safety, while keeping a 20 to 30 degree bend in your elbows when your hands rest at nine and three. If you cannot achieve both, use the telescoping adjustment before moving the seat.
Should I use a lumbar cushion if my vehicle doesn’t have lumbar support?
Yes, provided it is sized correctly. A small cushion or rolled towel placed at or just above your beltline restores the natural lumbar curve. Avoid large cushions that push you forward far enough to disturb your steering wheel and pedal positioning.
Why does my neck hurt after driving even though my back feels fine?
Neck pain with a comfortable back usually points to one of three causes: a backrest reclined too far, forcing your head forward to maintain sightlines; a head restraint set too low or too far back; or mirrors positioned so that checking them requires a repeated head turn beyond a comfortable range.
How often should drivers reassess their seat setup?
Reassess after any meaningful change: a new vehicle, a significant change in body weight, a return from injury or leave, or the onset of new discomfort. For drivers who log substantial road time, an annual check is reasonable, and shared vehicles should be reset at the start of every shift.
E3 Consulting’s Approach to Vehicle Ergonomics
At E3 Consulting, we treat vehicle setup as a full component of a workplace ergonomics program rather than an afterthought for the employees who happen to drive. Our vehicle ergonomic assessments evaluate the fit, comfort, and operational suitability of fleet or personal vehicles for the specific personnel assigned to them, and they are available both virtually and onsite.
Virtual evaluations run about 30 minutes over Zoom, Teams, or Google Meet, with a photo review completed in advance so the consultant arrives already understanding the driver’s current setup. Onsite evaluations run 30 to 45 minutes at your office location or a dealership and include hands-on coaching, which tends to produce better retention because the driver performs each adjustment themselves. For organizations that want to reach a larger group at once, we build customized webinars of 15 to 30 minutes covering vehicle setup, in-cab stretches, and guidance on selecting vehicles that will fit your workforce.
We also track outcomes. Our ErgoTrac Pro software logs ergonomic consultations, employee anthropometric trends, and training video usage on real-time dashboards, which gives safety and HR teams something more durable than a stack of individual reports. Over time that data tells you which vehicles in your fleet accommodate your people well and which ones consistently generate complaints.
Vehicle seats are one piece of a larger picture. Many of the drivers we work with also spend part of their week at a desk, and the same principles that govern a properly configured workstation apply behind the wheel. When both environments are addressed together, employees stop moving from one source of strain to another.
Key Takeaways
Setting up a vehicle seat correctly takes about five minutes and follows a specific order: seat height, then seat depth and pedal distance, then backrest angle, then lumbar support, then the headrest, then the steering wheel, and mirrors last. Each step establishes the reference point for the one that follows, which is why working out of sequence produces a setup that never quite settles.
Getting it right protects against the low back, neck, and shoulder complaints that drive a meaningful share of workers’ compensation costs for organizations with mobile employees. It also tends to be the intervention with the fastest payback, because unlike furniture, it requires no purchase at all in most cases.
Ready to make vehicle ergonomics part of your workplace safety program? Contact E3 Consulting today to schedule a vehicle ergonomic assessment or to build a driver training program for your team. Our certified specialists will help you fit your vehicles to your people rather than the other way around.


